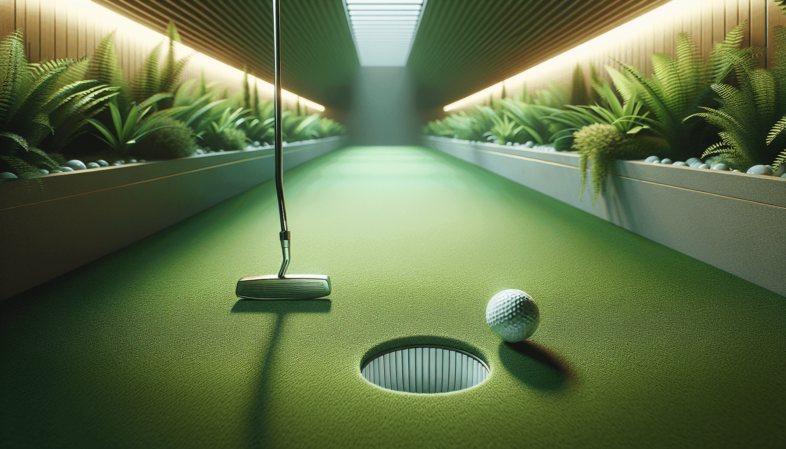
Have you ever wondered how to create the perfect space for practicing your putting skills indoors? Achieving the ultimate indoor putting green involves various aspects, but one of the most critical is ensuring it is level. A level surface can make all the difference in your practice sessions — helping you develop consistency in your strokes and confidence in your game.
Understanding the Importance of a Level Indoor Putting Green
A level putting green is essential for replicating real-life playing conditions. If your green is uneven, it could lead to inaccurate putting practice. This inconsistency can affect your muscle memory and stroke mechanics, which are vital for transferring skills to the course.
When practicing on an unlevel green, you may develop the wrong feel for distance control and break. Understanding why leveling your putting green matters helps you appreciate the effort you’ll put into ensuring it’s just right.
Identifying the Right Spot for Your Indoor Putting Green
Before you can ensure that the green is level, you first need to determine where to place it. The location plays a significant role in how level you can keep your putting green.
Choosing the Right Room
A spacious room with minimal furniture is typically ideal. Look for an area that receives good natural light and has comfortable overall conditions. Here are a few things to consider when selecting the room:
| Factors to Consider | Description |
|---|---|
| Size | Ensure ample space for putting practice. |
| Light | Natural light can enhance your experience. |
| Flooring Type | Carpet or hardwood impacts leveling. |
| Temperature | A controlled climate is beneficial. |
Selecting the right room sets the foundation for a successful setup, making it easier to focus on leveling your indoor putting green next.
Evaluating Floor Type
Your floor’s material can significantly impact the leveling process. Different flooring types can shift or settle over time. Here’s how to assess your flooring:
- Carpet:
- Provides a soft surface that can absorb some imperfections, but could also hide unevenness.
- Hardwood:
- Offers a firmer surface but can expand or contract with humidity and temperature changes.
- Tile:
- Typically a stable option, but check for any loose tiles that could disrupt the level.
Understanding your floor type helps you choose the right approach for leveling your indoor putting green.
Tools and Materials You Will Need
Before setting up your putting green, gather the necessary tools and materials. Having everything on hand will make the leveling process smoother.
Essential Tools
Here’s a rundown of tools to have ready:
| Tool | Purpose |
|---|---|
| Level | To measure the surface for accuracy. |
| Tape Measure | To determine dimensions of the green. |
| Wooden Plank | Helps create a straight edge for leveling. |
| Shims | To fill gaps in uneven surfaces. |
| Markers | For marking problem areas and dimensions. |
Having these tools handy allows you to work efficiently, ensuring your putting green is perfectly level.
Optional Materials
Besides the essential tools, consider additional materials to enhance your setup:
| Material | Purpose |
|---|---|
| Artificial Turf | For creating the green itself. |
| Adhesive | To secure the turf to the base. |
| Sand or Base Material | To create a solid substrate underneath. |
Choosing optional materials can elevate your indoor putting green experience and help maintain its levelness over time.
Laying the Foundation for a Level Indoor Putting Green
After gathering your tools and choosing a suitable location, it’s time to lay the foundation. The following steps will guide you to ensure a flat, stable base for your putting green.
Measuring the Space
Start by measuring the area you designated for your green:
- Use a tape measure to determine the dimensions of the space.
- Mark the corners using small markers or tape.
- Draw a rectangle on the floor if needed to visualize the green.
Accurate measurements help you select the right size for your putting green while ensuring it fits well in your space.
Checking for Level
Now that you have your area measured, grab your level and follow these steps:
- Place the level on the ground in multiple spots around the designated area.
- Check for bubbles indicating unevenness.
- Identify high and low spots.
If no bubbles appear in the center, you’re on a flat surface. If they do, note the areas that need attention.
Addressing Uneven Surfaces
Once you identify any slopes or uneven surfaces in your area, it’s time to get to work.
Filling Low Spots
To fill in low areas, you can use shims or a base material to create a flat surface:
- Insert shims into the low spots to raise them, then check for level again.
- Consider stacking shims if a single layer isn’t enough.
- Use sand or gravel to fill in larger low areas. Spread evenly and compact it down as you go.
Lowering High Areas
If you have high spots that need to be lowered, you’ll need to shave down those areas:
- Use a hand tool or saw to carefully trim down wood or other material.
- Ensure any adjustments do not damage flooring beneath.
- Recheck for level to confirm adjustments are effective.
Addressing unevenness before laying your putting green ensures you’ll have a fantastic surface for practice.
Installing Your Indoor Putting Green
After ensuring your area is level and ready, it’s time to install the putting green itself.
Selecting the Right Artificial Turf
Choosing the right artificial turf is crucial for providing a realistic putting experience. Look for:
- Weight: Heavier turf generally offers a more stable indoor condition.
- Thickness: Thicker turf can provide a better feel and ball roll, mimicking natural greens.
- Material: Ensure the turf is created for indoor use to withstand wear and maintain its quality.
Properly choosing turf allows for a more authentic practice experience, enhancing your skills.
Laying the Turf
Once you’ve confirmed your turf selection, follow these steps to lay it smoothly:
- Roll out the turf onto the leveled area.
- Trim the edges if necessary, ensuring a snug fit.
- Secure the edges with adhesive to avoid lifting or curling edges.
Careful installation will keep your putting surface intact while you practice.
Maintaining Your Indoor Putting Green
After your indoor putting green is installed and level, it’s essential to maintain it over time.
Regular Checks for Levelness
It’s a good idea to check the level of your putting green regularly. Here’s what to do:
- Use your level to check for any shifting or settling.
- Address any unevenness immediately to avoid long-term issues.
Regular maintenance can extend the life of your putting green and ensure your practice remains effective.
Cleaning and Care
To keep your green in top shape, establish a cleaning routine:
- Vacuum the turf frequently to remove debris and dirt.
- Brush the fibers back upright if they become matted down.
- Spot clean stains with a mild soap and water solution.
This care helps maintain a beautiful and functional putting green while prolonging its life.
Final Thoughts
Establishing a level indoor putting green involves careful planning and execution. By understanding the importance of a level surface and following the outlined steps, you’ll create an environment that aids in improving your putting technique. Without the distractions of uneven surfaces, you’ll gain the confidence needed to translate your indoor practice to the course.
With the right tools, strategies, and maintenance, your indoor putting green will serve as an effective training ground for years to come. Embrace the process, stay committed, and watch your skills flourish in no time. Happy putting!

