Have you ever found yourself dreaming of perfecting your putting skills right in the comfort of your own home? If so, an indoor putting green might just be the ideal addition to your space! But before you get started on your putting green project, you may be wondering: what materials are typically used in its construction? Let’s break it down together.
The Basics of Indoor Putting Greens
Creating an indoor putting green involves several components that work together to simulate the experience of a real golf course. Understanding the materials involved will help you appreciate the craftsmanship and thought that goes into your custom putting green.
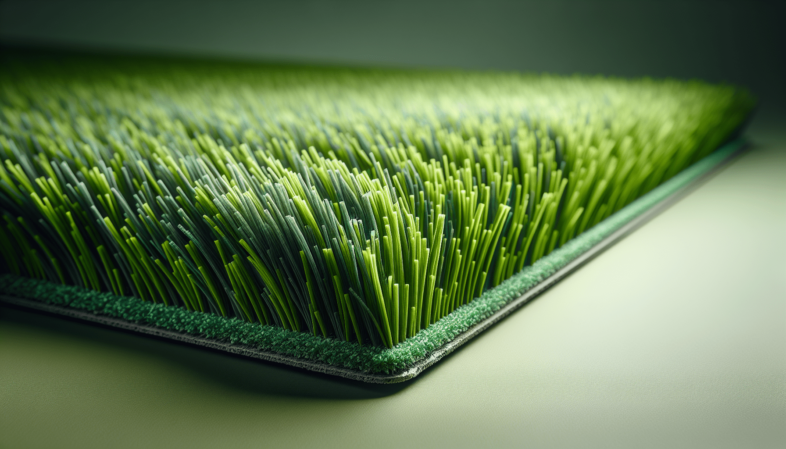
Turf: The Star of the Show
Turf is undoubtedly the most crucial element of your indoor putting green. It serves not only as the playing surface but also contributes to the overall aesthetic of your space. There are primarily two types of turf you can choose from:
- Synthetic Turf: This option closely mimics natural grass while providing durability and low maintenance. It comes in various weights and pile heights, allowing you to customize your green based on your preferences.
- Natural Grass: While less common for indoor applications, some people opt for natural grass in larger settings. This choice usually requires more upkeep but can provide an authentic feel. It’s essential to include proper drainage when using natural grass indoors to avoid mold and odor issues.
Whichever option you choose, selecting high-quality turf is vital for a realistic putting experience.
Base Material: Setting the Foundation
The base of your putting green is equally important as it provides stability and support. Here are some common base materials:
- Crushed Stone or Gravel: This is often used to create a sturdy base that allows for proper water drainage. It is essential for synthetic greens, ensuring that the turf stays in excellent condition over time.
- Plywood or Wooden Boards: For a more rigid structure, plywood can serve as a solid foundation. However, it must be treated to resist moisture, especially if you choose to have a natural grass green.
- Concrete: Many premium indoor putting greens utilize poured concrete for a robust, stable foundation. While this requires more investment, it provides a long-lasting, level surface for any type of turf.
- Foam or Rubber Underlayment: To enhance the feel of the putting experience, adding a layer of foam or rubber underlay helps in absorbing impact while also preventing wear on the turf.
The appropriate base material will depend on the specific design and intended use of your indoor putting green.
Drainage Systems: Keeping It Dry
Failure to adequately manage drainage can lead to issues like mold, odors, and even damage to your indoor setting. Here’s how to ensure proper drainage in your project:
- Drainage Grates: Incorporating drainage grates into your base can help prevent water from pooling on the surface and promote quick evaporation.
- Sump Pumps: In larger indoor setups, using sump pumps can effectively remove excess water, especially if you’re watering natural grass.
- Perforated Pipes: These enhance drainage efficiency and can be positioned within the base material to keep moisture levels well-regulated.
Having a robust drainage system is essential for maintaining the integrity and longevity of your indoor putting green.
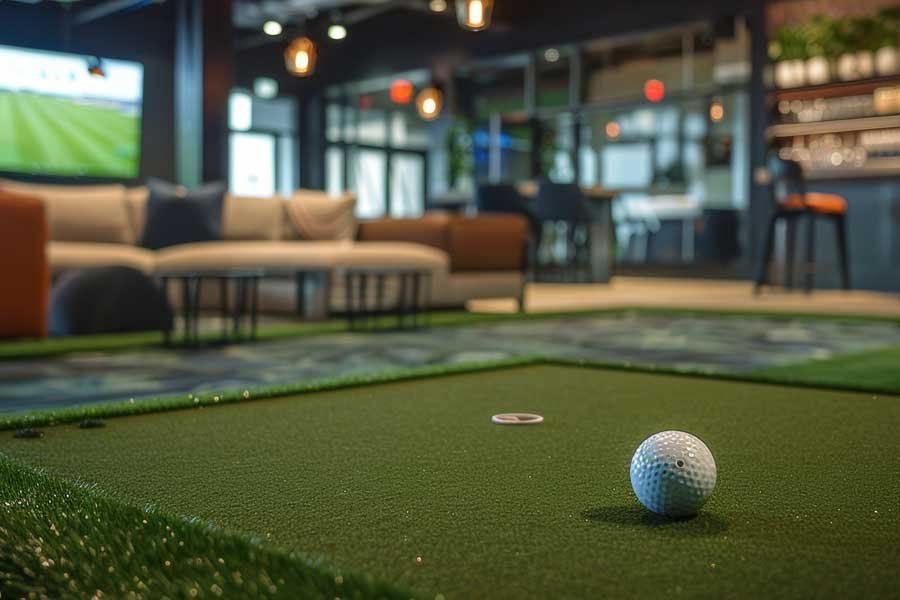
Putting Green Accessories: Enhancing Your Experience
Having the right accessories can greatly enhance your putting experience. Here are a few must-haves:
- Putting Cups: You’ll need realistic cups that mimic those found on an actual golf course. Look for adjustable cups that suit different depths and sizes.
- Edge Barriers: Installing edge barriers can help define the space and keep the turf in place, making it look polished and professional.
- Golf Training Aids: Incorporating training aids can provide you with valuable feedback on your putting technique. Consider options like alignment sticks, mats featuring guidelines, or even remote-controlled ball return systems.
- Lighting: Good lighting is crucial for visibility, especially if you plan to use your indoor putting green in the evening. Ensure you have sufficient overhead fixtures that mimic natural light conditions.
With the right accessories, you can maximize your practice sessions and transform your indoor putting green into a true simulation of the game.
Tools for Installation: DIY or Professional Help?
You’ll also want to consider the tools necessary for constructing your putting green. If you’re taking the DIY route, here are some tools you may need:
- Utility Knife: Great for cutting turf and trimming it to fit your designated area.
- Trowel: Useful for spreading base materials and ensuring an even layer.
- Level: A leveling tool will help ensure that your base and turf are even, which is critical for accurate putting.
- Staples/Nails: These will help secure your turf to the base materials effectively.
If these tasks seem daunting, hiring professional installers may be a sound option. They possess the experience and expertise to ensure your indoor putting green is constructed flawlessly.
Cost Considerations: Budgeting Your Dream Green
When planning an indoor putting green project, understanding the potential costs is crucial. The price can vary greatly depending on materials, size, and complexity chosen. Here’s a simplified breakdown:
| Material | Estimated Cost |
|---|---|
| Synthetic Turf | $2 – $5 per sq. ft. |
| Natural Grass | $4 – $8 per sq. ft. |
| Base Materials (Gravel) | $0.50 – $1 per sq. ft. |
| Base Materials (Concrete) | $3 – $8 per sq. ft. |
| Drainage Systems | Varies widely, $500+ |
Remember, investing in high-quality materials will pay off in the long run with performance and durability.
Maintenance Tips: Keeping It in Top Shape
Just like any other part of your home, an indoor putting green requires regular maintenance. Here are practical tips to keep it looking and performing its best:
For Synthetic Greens:
- Regular Brushing: Brush the turf with a stiff bristle broom to keep fibers upright and clear debris accumulating.
- Hose Down: Occasionally spray off dirt and debris with a hose to maintain the turf’s look.
For Natural Grass:
- Mowing: Regular mowing is essential to keep the grass at an appropriate height for putting.
- Watering: Ensure that your natural grass receives adequate water, especially if you notice it looking dry or brown.
- Aeration: Tilling the topsoil occasionally allows water and nutrients to reach the roots of the grass.
By adhering to these maintenance tips, you can ensure that your indoor putting green remains a delightful and functional space for years to come.
Conclusion: Craft Your Perfect Indoor Putting Green
Now that you’re familiar with essential materials used in constructing an indoor putting green, you can embark confidently on your journey. Whether you choose synthetic turf, natural grass, or a combination, it’s all about creating a space where you can practice, relax, and indulge your passion for golf.
Carefully consider each component from the base materials to accessories, and don’t forget about drainage systems and maintenance requirements. With the right planning and execution, you can develop a putting green that enhances both your skills and your home.
Are you ready to take your putting practice to the next level? Your dream indoor putting green is just a project away!

