Creating a backyard putting green can transform your space into a fun and functional area for the whole family. This article will guide you through the essentials, from selecting the ideal location and choosing the right equipment to maintaining your green in top condition. With some commitment and the right tools, you can achieve a putting surface that, while not a professional course, will provide enjoyment and practice for golf enthusiasts of all levels.
Throughout this guide, you’ll learn how to start simple with a rotary mower to establish a basic putting area. As you progress, you’ll discover how to advance to better equipment like manual reel mowers and eventually, if you’re feeling ambitious, a professional greens mower. Whether you’re focusing on high-quality turf or effective maintenance techniques, this journey promises to be rewarding and engaging as you create your very own putting paradise.
Purpose of Backyard Putting Green
Creating a backyard putting green can transform your outdoor space into a source of joy and relaxation. It’s not just a trendy addition; it offers multiple benefits that enhance your backyard experience.
Fun for Family and Friends
Imagine hosting a family BBQ or a gathering with friends and having a fun putting challenge right in your backyard! A putting green can turn any casual gathering into a delightful game, creating opportunities for laughter and bonding. Whether it’s a friendly competition or simply the joy of bringing out the kid in everyone, your backyard putting green can provide countless hours of entertainment for guests of all ages.
Practice Area for Golf Enthusiasts
For those passionate about golf, a backyard putting green serves as an excellent practice area. You can refine your putting skills without having to drive to the golf course. The convenience of practicing at home means you can schedule your sessions whenever you have the time. This addition can help immensely with skill development, allowing you to focus on your short game in an environment that’s always accessible.
Enhancing Backyard Aesthetics
Beyond its functional benefits, a well-maintained putting green can significantly enhance the aesthetic appeal of your backyard. It adds an inviting, green touch that can make your outdoor space feel more lush and carefully curated. A putting green can also serve as a visually impressive focal point, impressing your guests and providing a beautiful backdrop for your home.
Initial Steps
Before diving headfirst into creating your putting green, it’s important to take some initial steps to set yourself up for success.
Cutting a Test Area to a Low Height
Start by selecting a section of your yard where you can experiment. Cut this area to a low height using your rotary mower’s lowest setting. This serves as a test area to see how your current grass type handles shorter cutting. Observing how well this section fares will help you understand whether you should proceed or adjust your plans.
Choosing the Right Grass Varieties
Not all grasses are created equal when it comes to lawns, let alone putting greens. You should consider selecting grass varieties that tolerate lower heights and provide a smooth surface. For cool seasons, Bentgrass is a popular choice, while Bermuda grasses thrive in warm seasons. Selecting the right type of grass is crucial for achieving a high-quality putting surface.
Utilizing Existing Turf for Sustainability
You don’t have to start from scratch when creating your putting green. You can utilize existing turf in your yard, promoting sustainability. Most existing grass types can survive at shorter heights, providing you a great springboard for your project. Just be cautious to avoid varieties like St. Augustine that may not perform well when mowed low.
Equipment Recommendations
Having the right equipment is essential for establishing and maintaining your backyard putting green.
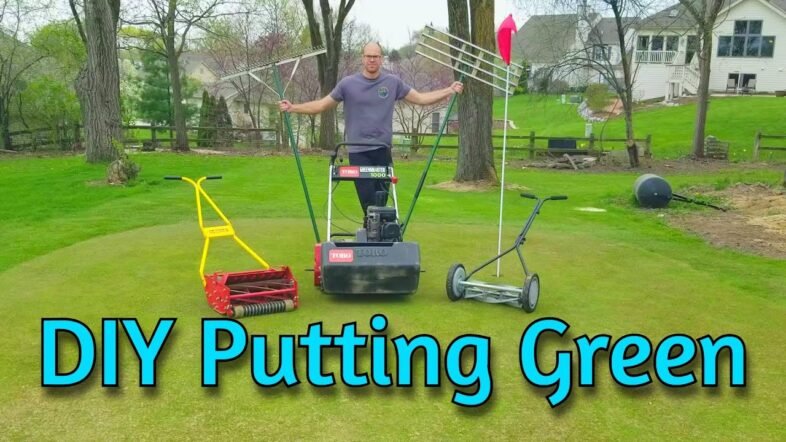
Choosing the Right Cut Mower (Rotary vs. Reel)
When selecting a mower, you have a choice between rotary and reel mowers. Rotary mowers are typically easier to handle for beginners, while reel mowers offer superior cutting precision, especially at lower heights. For putting greens, reel mowers are often ideal as they provide a clean cut that supports a healthier grass structure.
Entry-Level Powered Reel Mowers for Beginners
If you’re new to creating putting greens, consider starting with an entry-level powered reel mower. These mowers typically allow you to achieve the desired low cut without the complexity and expense of higher-end models. They’re user-friendly, making them a great choice for anyone just beginning their backyard putting journey.
Finding Quality Used Mowers on Marketplace Platforms
Don’t overlook the possibility of buying a quality used mower. Many people sell their gently-used equipment on marketplace platforms at a fraction of the price, allowing you to obtain a higher-quality model that fits your budget. Keep an eye out for brands known for their durability and effectiveness, as investing in a good mower will pay off in the long run.
Achieving Better Results
Once you’ve set up your putting green, you’ll want to focus on maintaining it for optimal performance.
Maintaining Grass Heights Below Half an Inch
To achieve that smooth, professional putting green feel, aim to keep your grass heights below half an inch. This can significantly enhance the ball roll, making your green more enjoyable and practical for practicing your putts. Regularly check your mowing heights and adjust accordingly to maintain this standard.
Importance of Sand Topdressing
One effective technique for improving your putting surface is sand topdressing. Applying a thin layer of sand helps fill in any low spots and creates a smoother surface over time. It also helps with drainage and promotes healthier grass roots. Multiple applications may be necessary, but the consistent results will make it worthwhile.
Techniques for Creating a Smooth Putting Surface
Achieving a smooth putting surface requires attention to detail. Regular raking, rolling, and topping off with sand can help eliminate any bumps or irregularities. Incorporating these techniques into your maintenance routine will ensure your green remains in top shape for putting practice or recreational fun.
Advanced Techniques
Once you’re comfortable maintaining your putting green, you can explore some advanced techniques to enhance performance and appearance further.
Using Specialized Mowers for Greens Height
For the ultimate putting experience, consider investing in a specialized mower designed to achieve greens height (around an eighth of an inch or less). These mowers guarantee precision cuts and contribute to an exceptional putting surface. While they may come with a higher price tag, the results are often well worth the investment for dedicated golf enthusiasts.
Improving Soil Structure for Better Grass Health
The health of your grass largely depends on the quality of your soil. Focusing on improving soil structure by aerating and incorporating organic matter can promote healthier growth and better drainage. Aerating your putting green regularly helps alleviate compaction, encouraging deeper root growth and ultimately a healthier green.
Aeration Techniques for Optimal Performance
Aeration is one of the key components to achieving a high-quality putting green. It allows air, water, and nutrients to penetrate the soil, ensuring your grass grows strong and resilient. Various aeration techniques—such as core aeration or using spike aerators—can greatly benefit your turf. Make this part of your maintenance routine, and you’ll notice significant improvements in your putting surface over time.
Turf Type Recommendations
Choosing the right grass type is critical for the success of your backyard putting green.
Selecting Bentgrass for Cool Seasons
Bentgrass is widely recognized as one of the best grass types for cool season putting greens. It establishes a dense, lush carpet ideal for putting. This grass thrives in cooler climates, making it perfect for many homeowners looking to build a green that can offer exceptional performance when nurtured correctly.
Choosing Bermuda for Warm Seasons
For those in warmer regions, Bermuda grass shows excellent resilience and a beautiful appearance in summer. It handles heat well, and with proper care, it can maintain a stunning green facade. Given its growth habits, Bermuda grass also recovers quickly from wear and tear, making it ideal for a backyard putting green.
Understanding Zoysia and its Benefits
Zoysia grass is another excellent option you might consider for your putting green. It excels in warmer climates and offers a beautiful texture that many homeowners appreciate. It’s drought-resistant and requires less maintenance than some other varieties, making it a practical choice for busy individuals who want a putting green without the heavy upkeep.
Options for Setup
The setup of your putting green can vary widely based on your preferences, budget, and overall goals.
Starting Simple with Basic Equipment
If you’re just starting, consider keeping things simple. Utilize your existing rotary mower set to low settings in a designated area of your yard. This basic approach can introduce you to the joy of having a putting green without overwhelming you with upfront costs or complicated equipment.
Upgrading to Manual Reel Mowers
As you gain confidence and see the benefits of your putting green, it may be time to upgrade to a manual reel mower. These mowers can achieve those lower cutting heights necessary for optimal putting conditions. You can commonly find these mowers for reasonable prices, making them an affordable upgrade for your setup.
Investing in Professional-Grade Tools
For those truly committed to excellence, investing in professional-grade tools can yield fantastic results. This includes specialized greens mowers to achieve precise cutting heights and leveling rakes for maintenance. While such equipment can come with a higher cost, it often pays off with the performance and quality of your putting green.
Site Selection
Choosing the right location for your putting green is fundamental to successful growth and functionality.
Choosing a Flat Area for Optimal Ball Movement
Look for a flat area of your yard for creating your putting green. A flat surface allows for optimal ball movement and makes maintenance easier over time. Avoid sloped areas as they may impact ball roll and overall performance, leading to frustrations rather than fun.
Recommended Size for Usability and Maintenance
When selecting the size for your putting green, consider an area around 500 to 1,000 square feet. This size ensures usability while also being manageable for maintenance. A larger size can sometimes require excessive upkeep, while too small an area might limit your playing experiences.
Assessing Sun Exposure and Drainage
Finally, assess the sun exposure and drainage of your chosen area. An ideal location will have good sunlight throughout the day, strengthening your grass while ensuring it stays healthy. Also, consider any drainage problems; proper drainage is essential to prevent water pooling, which can damage your putting surface.
Basic Tools and Costs
Equipping yourself with the proper tools will help streamline the process and ensure the success of your backyard putting green.
Essential Tools and Their Functions
Some essential tools for maintaining your putting green include a reel mower for cutting, a rake for leveling, and sand for topdressing. While these tools may seem basic, they are crucial for creating and maintaining a quality green. As you progress, consider adding additional tools like aerators or specialized leveling equipment.
Estimating the Initial Investment
Getting started with your backyard putting green won’t break the bank, with initial investments typically ranging from $200 to $300. This encompasses the basic tools necessary for creating your green. Keep in mind that the investment can increase based on the complexity of your project and quality of tools chosen.
Budgeting for Ongoing Maintenance Supplies
In addition to the initial costs, you should budget for ongoing maintenance supplies such as sand, fertilizers, and other necessary materials. Regular maintenance should require a minimal daily effort and occasional longer sessions for aerating or topdressing. Planning for these ongoing costs will help ensure your putting green remains in top condition.
Conclusion
Creating a backyard putting green is both an exciting and rewarding project. With the right planning, commitment, and equipment, you can establish a beautiful space that serves as both a recreational area and a practice zone for your golfing skills.
Recap of Key Points to Creating a Putting Green
Throughout this guide, we’ve explored the purpose behind a backyard putting green, the essential steps to set it up, equipment recommendations, and the proper techniques for maintaining an exceptional putting surface. Each of these elements plays a vital role in your success and enjoyment of this project.
Encouragement to Start the DIY Project
Don’t hesitate to embark on this DIY adventure; you might surprise yourself with how fulfilling and enjoyable this journey can be. The sense of accomplishment you’ll gain from creating and perfecting your own putting green is invaluable, not to mention the fun experiences you and your loved ones will share on it.
Final Thoughts on Enjoying Backyard Golfing
Ultimately, the goal of your backyard putting green is to create a space where you can unwind, practice, and enjoy golf, all from the comfort of your own home. As you embark on this journey, remember to have fun and appreciate each step along the way. Happy putting!

