Creating a personal putting green at home can transform your backyard into a golfer’s paradise. With the right materials and a little effort, you can enjoy countless hours of practice without leaving your property. This article walks you through the simple steps of building a putting green, from choosing the right synthetic grass to shaping and securing your turf, ensuring it’s both functional and visually appealing.
You’ll discover how to add fun features like a sand bunker to improve your short game, along with selecting easy-to-care-for plants that complement your new setup. By the end of this guide, you’ll have all the tools and tips you need to turn an ordinary yard into a golfer’s dream, making it a hit with family and friends alike.
Understanding the Need for a DIY Putting Green
Creating your very own DIY putting green at home can be both a fun project and a rewarding addition to your backyard. Whether you’re a passionate golfer or just want to add a unique element to your outdoor space, a putting green offers a perfect solution.
Benefits of Having a Putting Green at Home
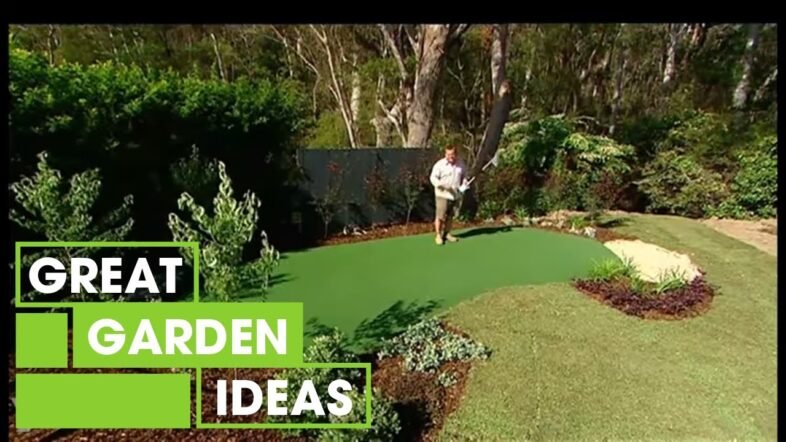
Imagine stepping out into your backyard whenever you feel like practicing your short game! A putting green not only enhances your home’s value but also provides endless entertainment for family and friends. It encourages a healthy lifestyle and offers you a convenient space to improve your golf skills. You can enjoy quiet moments of practice or host friendly competitions. Plus, having your own putting green means no more driving to the course, saving both time and money.
Understanding Your Space Requirements
Before diving into your project, it’s important to assess the available space in your yard. Depending on the scale you want, a putting green can fit into a variety of backyard sizes. Even small yards can accommodate a compact green. Consider the shape of the area: a classic kidney shape is often a favorite for its aesthetic appeal, but you can customize the dimensions to suit your yard and personal preferences.
Involving Family and Friends in the Project
A DIY putting green is an excellent opportunity to involve your family and friends in a fun and collaborative project. Not only will you create lasting memories together, but you can also maximize creativity and inspiration. Enlist their help with different stages of the construction, whether it’s assembling materials, designing the layout, or simply providing moral support as you tackle the project together!
Planning Your DIY Putting Green
Once you’ve decided that you want a putting green, it’s time to start planning. This phase is crucial for ensuring a successful project.
Choosing the Right Location in Your Yard
Assess your yard to find the perfect location for your putting green. Look for a flat area with good drainage and access to sunlight. Avoid places where leaves may frequently fall or areas that become muddy after rain. The goal is to create a consistent putting surface, so a location where maintaining the green will be straightforward is ideal.
Deciding on the Size and Shape of Your Green
Think about how much space you want to allocate for the putting green. Common sizes vary, but you should consider your golfing goals and family activities. A standard size allows for a realistic practice experience, while a smaller one might suit casual play. Don’t shy away from giving it a unique shape that fits within your yard’s design, making it both functional and visually appealing.
Budgeting for Materials and Tools
A successful DIY project begins with a solid budget. Determine how much you’re prepared to spend on materials and tools. Consider costs for synthetic grass, base materials, landscaping features, and any additional tools you may need. By creating a detailed budget, you can plan ahead to avoid any unexpected expenses during the process.
Selecting the Ideal Artificial Grass
Choosing the right artificial grass is one of the most important steps in building your putting green.
Types of Synthetic Grass Available
There are various types of synthetic grass to choose from, each offering different looks and feels. For a putting green, you’ll want something with a short, dense pile to closely mimic real grass. Options include turf designed specifically for putting, which often has thatch layers and a more realistic texture.
Durability and Maintenance Considerations
When selecting artificial grass, ensure it’s durable enough for regular use. Some types are better suited for high foot traffic and won’t degrade under the sun. Keep in mind how easy the grass will be to clean and maintain— a low-maintenance option will save you time and effort in the long run.
Color and Texture Choices for Realistic Looks
Choosing the right color and texture can transform your putting green into a visually stunning feature in your yard. Opt for natural hues that mimic real grass. Textured turf will not only look more authentic but will also simulate the feel of putting on a real green, giving you the best practice experience possible.
Preparing the Ground for Your Putting Green
Preparation is a key step in creating a functional and beautiful DIY putting green.
Clearing the Area and Removing Debris
Begin by clearing the chosen area of any debris, rocks, or vegetation. You’ll want a clean, flat surface to work on so that the base layer can be laid down evenly. Take the time to ensure you’ve removed all potential obstacles before proceeding.
Using Road Base for a Level Foundation
To create a stable foundation, you’ll need to lay down a road base. This aggregate material provides excellent drainage and stability. Spread it evenly across the area, ensuring it’s adequately compacted to prevent shifting in the future. A level base is essential for a quality putting surface.
Creating a Sloped Surface for Challenging Play
Consider incorporating a slight slope into your green for added challenge. This can enhance your practice and make your green feel more like a real course. Work on shaping the surface so that it accommodates various putting angles, ensuring you’re always getting a realistic experience.
Installing the Base Layer
After preparing the ground, it’s time to install the base layer.
Using Cement for Stability and Strength
For added durability, you might want to incorporate a thin cement layer over the road base. This will help solidify the structure and prevent it from shifting over time. Sprinkle cement evenly and then compact it down so that it sets properly.
Applying Crusher Dust for Smoothness
Once the cement has set, apply a layer of crusher dust on top. This material acts like icing on a cake, providing a smooth and even surface for your putting green. Compact it thoroughly to ensure a seamless finish.
Finalizing the Level of the Base Layer
Use a level to ensure that your base layer is even. If any areas need adjustments, now’s the time to make them. The smoother the base, the better your putting experience will be.
Laying Down the Synthetic Grass
With the foundation in place, it’s time for the exciting step of laying down the synthetic grass.
Rolling Out the Turf Correctly
Begin by rolling out the synthetic turf over the entire prepared base. Be gentle, yet precise, to avoid any wrinkles or folds. Ensure that the grass lays flat, as any imperfections will affect your putting surface.
Joining the Pieces Together Seamlessly
Most installations will require you to join multiple pieces of turf together. Use specialized turf joining tape to connect the edges, ensuring a seamless look. This tape allows for a strong bond while remaining discreet, maintaining the aesthetics of your putting green.
Securing the Grass with Stakes or Pegs
To prevent the turf from shifting or lifting during use, secure it with stakes or pegs. Hammer them in around the edges, allowing for some camouflage by using green pegs which blend in with the grass. This way, the installation looks professional while ensuring stability.
Adding Challenges and Features
You can make your putting green even more engaging by adding some fun challenges.
Incorporating a Sand Bunker for Short Game Practice
If you want to simulate real golfing experiences, consider creating a sand bunker. This addition provides a fantastic surface for practicing chip shots. Dig out a shallow area and fill it with washed beach sand to keep it compact and usable.
Design Suggestions for Holes and Flags
You can create multiple holes and placing flags will give you variety during practice. Space them so there are different distances and angles for a more realistic experience. Consider not just designing for easy putts, but for challenging shots as well, to keep improving your skills.
Creating Undulating Surfaces for Authentic Play
For longer practice sessions, add contours to your putting surface. Slight elevations and depressions will mimic a professional putting green, allowing you to enhance your skills in different scenarios. It’ll also add visual interest to your backyard.
Enhancing Aesthetics with Landscaping
Your putting green should be a feature that enhances the entire backyard landscape.
Choosing Low-Maintenance Plants
To complement your new green, select low-maintenance plants that won’t require constant pruning or watering. Choose varieties that thrive in your local climate and enhance the overall look of your space.
Using Mulch for a Finished Look
A layer of mulch around the edges of the putting green can create a polished, finished appearance. It helps to define the space and blend in the synthetic grass with the natural elements. Plus, mulch can help prevent weeds!
Creating a Natural Barrier Around the Green
To delimit the putting green from the rest of the yard, consider creating a natural barrier using stones, flowers, or raised beds. This approach not only enhances the appearance of your green but also protects it from windswept debris and foot traffic.
Final Touches for Your Putting Green
As you approach the finish line, it’s time to add those last magical touches.
Installing Golf Flags for Target Practice
Purchase a few flags and place them into your holes for a fun and dynamic look. They’ll serve as visible targets to aim for during practice, adding an enjoyable element to your golfing experience.
Ensuring Proper Drainage and Water Movement
Make sure your putting green has proper drainage in place to avoid water accumulation. The slight slope you created earlier will assist with movement, but it’s important to ensure there are no puddles that could affect your practice area.
Routine Maintenance for Longevity
Regular maintenance will ensure your putting green lasts for many years to come. This includes occasionally brushing the synthetic grass, ensuring the sand bunker is replenished and maintained, and checking for any weeds or debris on the surface.
Conclusion
Reflecting on the DIY Journey
Building your own putting green is not just a project; it’s a journey filled with creativity and teamwork. Reflecting on what you’ve learned and accomplished can provide a sense of pride as you see your efforts take shape in your backyard.
Encouragement for Future Gardening Projects
Once you’ve tackled creating a putting green, you may find yourself inspired to take on more gardening projects. The satisfaction from this DIY endeavor can lead you to create additional features, such as flower beds, vegetable gardens, or outdoor living spaces.
The Joy of a Personal Backyard Golf Experience
Finally, imagine the joy of stepping into your backyard and being able to practice your putts while enjoying the fresh air. Your DIY putting green has not only improved your golfing skills but has become a cherished space for family and friends to gather and enjoy. Here’s to endless days of putting and fun in the sun!

