Creating your very own indoor putting green can be an exciting project that brings the joy of golf right into your home. Inspired by a simple YouTube tutorial, the journey has been revitalized, and with just a few materials from your local hardware store, you can build a green that will impress friends and family alike. This article will guide you through the easy steps to make it happen, along with tips and insights that could motivate you to finally take action.
In less than an hour, you’ll learn how to set up your green, making it a perfect spot for practice or friendly matches. Not only is it a fun DIY project, but you can also easily store it away when not in use. So, gather your supplies and let’s get started on transforming your space!
Understanding the Benefits of an Indoor Putting Green
Creating your own indoor putting green is not just a fun DIY project; it’s a chance to enhance your golfing skills right in the comfort of your own home. Let’s dive into some of the fantastic benefits that come with having an indoor putting green.
Convenience: Practice Anytime
Imagine being able to practice your putting skills whenever you want! With an indoor putting green, you no longer have to schedule your trips to the golf course. Whether it’s early in the morning or late at night, whenever you feel inspired to perfect your stroke, your home putting green is just a few steps away. You have the freedom to practice at your own pace and time.
Weather-Proof Training
Weather can often dictate your golf practice schedule. Rain, snow, or intense heat can keep you off the greens, but with your indoor putting green, that’s no longer an issue. You can practice regardless of the weather outside, ensuring that your game progresses all year round, come rain or shine.
Cost-Effective Golfing Solution
While immersing yourself in the golfing world may seem costly with green fees, club memberships, and travel expenses, an indoor putting green can serve as a cost-effective alternative. After the initial investment in materials, your putting green will have minimal ongoing costs, saving you money in the long run while allowing you to play anytime.
Enhance Your Skills in Comfort
Training indoors allows you to create a comfortable environment tailored to your liking. You can listen to your favorite music, control the temperature, and even have snacks nearby. This personalized setting will help you focus more on improving your putting skills without distractions from the outside world.
Materials Needed for Your DIY Indoor Putting Green
Before you dive into the exciting world of building your indoor putting green, it’s vital to gather the right materials. Here’s a comprehensive list to get you started on your journey.
Artificial Turf Selection
Choosing the right artificial turf is crucial for creating a realistic putting experience. You want a turf that mimics the feel of real grass and provides consistent roll. Look for high-quality options that are specifically designed for putting greens, as these will significantly enhance your practice sessions.
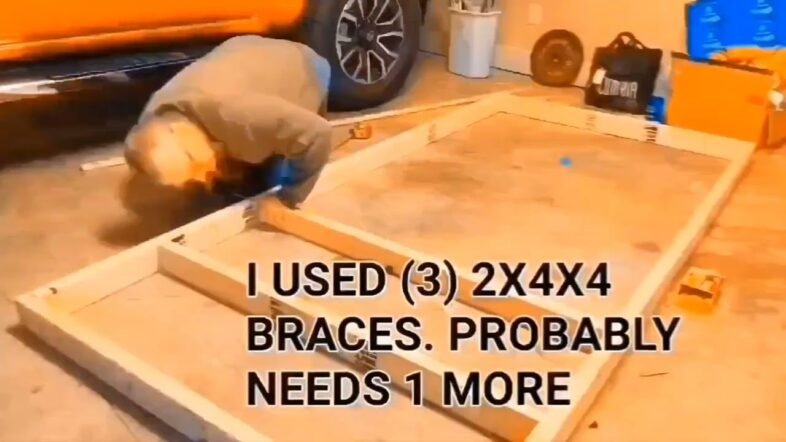
Base Materials: Wood and Plywood
For the base of your putting green, sturdy materials like wood and plywood are essential. You’ll want to ensure it’s level and durable enough to support the turf and any additional features you plan to incorporate. Cut the plywood to your desired size, considering how much space you have available.
Putting Cup and Accessories
The putting cup is the heart of your green! Selecting a high-quality cup that fits into your turf properly is necessary for a realistic feel. You may also add accessories like flagsticks, alignment aids, or even a practice ball return system to enhance your practice environment.
Tools Required for Assembly
To bring your indoor putting green to life, you’ll need some basic tools. Ensure you have a saw for cutting, a drill for installing the putting cup, and a utility knife for trimming the turf. Safety gear like gloves and goggles is also a good idea, ensuring your DIY experience is both fun and safe.
Step-by-Step Guide to Constructing Your Indoor Putting Green
Building an indoor putting green may seem daunting at first, but with a clear, step-by-step guide, you’ll find it quite manageable. Here’s how you can do it:
Measuring the Space for Your Green
Begin by measuring the area where you plan to install your putting green. Consider factors like room size and layout to determine how large your green can be. It’s best to visualize the space and mark it out on the floor before cutting any materials.
Cutting the Base Material
Using the measurements you took, cut your plywood or wood base to size. Make sure your cuts are straight to prevent any unevenness in your final product. When working with tools, always prioritize safety and accuracy—take your time!
Laying the Turf: Techniques and Tricks
Once you have your base ready, it’s time to lay the artificial turf. Start from one end and gradually roll it over the entire base. Make sure it lays flat without any wrinkles. Use an adhesive or turf tape to secure the edges and any seams firmly.
Installing the Putting Cup Properly
Now for the fun part: installing the putting cup! Cut a hole through the turf where you want your cup to go, ensuring it’s perfectly aligned. Once done, secure the cup in place. Follow the manufacturer’s instructions for the best results, ensuring it sits flush with the turf surface.
Design Ideas for Your Indoor Putting Green
Now that your putting green is constructed, you can customize it to improve its functionality and appearance. Here are some design ideas to consider:
Creating Multiple Holes for Variety
Why settle for one putting cup when you can have multiple? Design your green with several holes located at different distances and angles. This variety will challenge you and keep your practice sessions engaging.
Incorporating Elevation Changes
If you want to add a layer of challenge, consider incorporating slight elevation changes. This can be achieved by building up areas of the base using foam or wood to create slopes. Elevation changes will simulate different greens you might encounter on a golf course.
Adding Obstacles for Challenge
To sharpen your skills, consider adding obstacles! Whether it’s a small ramp, a barrier, or even a miniature sand trap, obstacles provide an extra layer of complexity. They can help you practice your shot accuracy and strategy.
Customizing the Turf Layout
Feel free to customize the layout of your putting green! You can use different colors of turf for borders or even create designs within the green. This is not just about practice; it can also be a fun expression of your personality.
Maintenance Tips for Your Indoor Putting Green
Just like any other addition to your home, your indoor putting green will require maintenance to keep it in top shape. Here are some essential tips:
Regular Cleaning to Keep It Fresh
Dust and dirt can accumulate on your putting green over time. Regularly sweep or vacuum the turf to keep it clean. For deeper cleans, use a mild detergent with warm water and a soft brush to eliminate stains and odors.
Inspecting for Wear and Tear
Periodically check your turf for any signs of wear. Look for fraying edges, worn areas, or lifts in the turf. Addressing any issues early will prolong the life of your green and ensure it remains enjoyable to use.
Storing the Green Properly When Not in Use
If you’re short on space, you may want to store your putting green when not in use. Depending on your design, you can roll it up and store it under your bed or in a closet. Ensure it’s in a dry environment to prevent mold and deterioration.
Maintaining the Putting Cup and Accessories
Don’t forget about the putting cup and other accessories. Regularly check that the cup remains secure and clean. If you have flagsticks or other elements, inspect them for any damage, as this can too affect your practice experience.
Cost Considerations for Your Indoor Putting Green
When embarking on a DIY project, being aware of costs is crucial. Consider the following to budget effectively for your indoor putting green:
Budgeting for Materials
Setting a budget for materials helps manage your overall spending. Estimate costs based on the materials discussed, and always add a little extra for unexpected expenses. As a friendly tip, always keep an eye out for sales or discounts at your local home improvement store!
Potential Additional Costs
In addition to your primary materials, consider any extra costs. This could involve purchasing tools if you don’t have them, refinishing materials, or ongoing maintenance supplies like cleaning products.
Military Discounts and Saving Money
If you’re a veteran or active military member, leverage those discounts! Many home improvement stores offer military discounts, so don’t hesitate to ask. It can help significantly reduce your overall costs.
DIY vs. Professional Installation Costs
Although we are focusing on a DIY project here, some may consider hiring professionals. While this streamlines the process, it will also inflate the costs quite a bit. Weigh your options carefully, and remember that with patience and effort, DIY can save you money.
Common Mistakes to Avoid When Building Your Putting Green
Learning from others can save you time and frustration. Here are some common mistakes you should avoid when building your indoor putting green:
Underestimating Space Requirements
One of the most frequent misconceptions is thinking you need less space. Make sure to measure not just for the green itself but for your practice area, allowing room tomove and swing freely.
Using Low-Quality Materials
Investing in low-quality turf or materials will only lead to headaches later. Skimping now will often mean more repairs and replacements in the future. Opt for high-quality products that provide a durable and authentic experience.
Neglecting to Plan the Layout
Failing to plan your layout can compromise the functionality of your green. Take your time to visualize the design before diving into construction. Thoughtful planning will enhance your practice experience and keep it enjoyable.
Ignoring Maintenance Needs
Many DIYers overlook maintenance until it becomes a significant issue. Stay proactive with your cleaning and inspection routine to avoid costly repairs down the line. Regular upkeep ensures the longevity and enjoyment of your putting green.
Enhancing Your Putting Green Experience
Put the finishing touches on your indoor putting green and make it an even more enjoyable experience with the following enhancements:
Adding Lighting for Evening Practice
Good lighting is essential, especially if you plan to practice in the evenings. Consider installing LED lights or spotlights to illuminate your putting area. Good lighting not only improves visibility but also adds a cool ambiance to your practice space.
Installing a Golf Simulator
If you’re looking to take your practice to the next level, think about integrating a golf simulator. This will provide you with a comprehensive analysis of your game and improve your skills exponentially. Reflecting your swings in simulated environments can be incredibly helpful!
Incorporating Multimedia for Fun
Have a love for golf playlists or motivational podcasts? Consider bringing in multimedia elements! Installing speakers can turn your practice into a fun, enjoyable experience, allowing you to groove while you improve.
Socializing: Creating a Golfing Area
Your indoor putting green can also serve as a fantastic social hub. Make it a place for friends and family to join in the fun with social practices or mini competitions—perhaps even a comfy seating area to relax in after a round of practice.
Engaging the Community: Sharing Your Experience
Being part of a community can enrich your DIY experience. Here’s how you can share your journey and inspire others:
Documenting Your Build Process
Take pictures and video as you build your putting green. Documenting the process will not only provide a keepsake but may also inspire others to take the plunge and build their own greens.
Creating an Online Community or Forum
Consider starting a blog or engaging on social media by sharing your project. Creating a platform where you share tips, experiences, and advice can help others and create a thriving community around DIY putting greens.
Hosting Small Golfing Competitions
Once your putting green is ready for action, why not invite friends over for a mini-tournament? Friendly competitions can boost your social life and provide valuable practice in a fun environment.
Encouraging Other DIYers to Share Their Greens
As you share your experiences, encourage others to do the same! Invite friends and fellow DIYers to showcase their greens. Sharing ideas, photos, and experiences can help everyone enhance their projects.
Conclusion
In summary, building your own indoor putting green isn’t just about at-home entertainment—it’s an investment in your golfing skills that pays off in comfort and convenience. With the right materials, planning, and maintenance, your indoor putting green can become a beloved part of your home and practice routine.
Remember, the journey to creating your DIY indoor putting green could lead to improved skills and enriched social experiences. So, gather your materials, and get started—you won’t regret it! Enjoy every moment on your new putting green and happy golfing!

