Transforming your outdoor space with a backyard putting green can be a fun and rewarding project. In this guide, you’ll find a straightforward approach to installing a high-quality putting surface, with insights from Dan Selden of StarPro Greens. The article will cover everything from product details to step-by-step installation instructions, including the necessary tools and materials needed for a successful setup.
Get ready to learn how to create an enjoyable area for practicing your putting skills. You’ll discover the importance of using the right gravel for proper drainage and structural integrity, along with tips for installing golf cups and optional borders. By the end of this guide, you’ll be equipped to enhance your backyard, providing endless entertainment for family and friends.
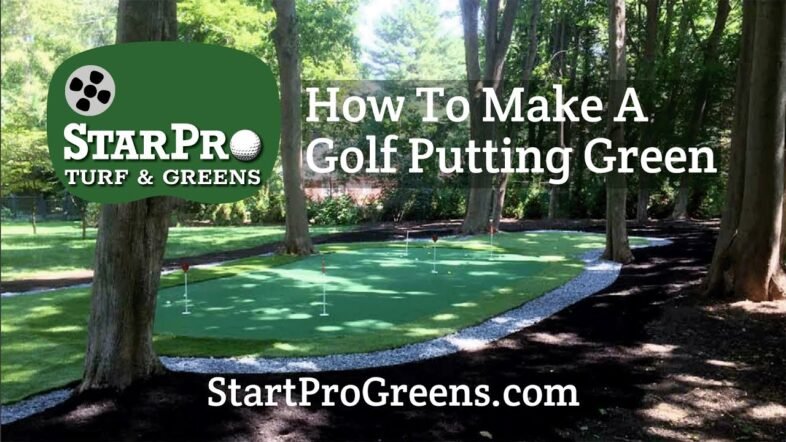
How to Install a Backyard Putting Green
Introduction to Dan Selden
Background of Dan Selden
Hello! You’re about to discover the delightful world of backyard putting greens with Dan Selden, the mastermind behind StarPro Greens. With a passion for golf and outdoor living, Dan has turned years of expertise in landscaping and turf solutions into a thriving business that provides top-notch putting greens for enthusiasts like you. His commitment to quality and customer satisfaction makes him a trusted figure in the turf industry.
Expertise in Backyard Installations
When it comes to backyard installations, Dan Selden is your go-to expert. He has honed his skills through extensive hands-on experience, guiding many homeowners in transforming their outdoor spaces into personal putting paradises. Whether you’re doing it yourself or hiring someone, Dan’s friendly approach and comprehensive knowledge ensure you’re in capable hands throughout the entire process.
Overview of StarPro Greens
StarPro Greens is renowned for crafting premium putting turf that closely resembles natural grass. Their unique Master Putting Turf (MPT) technology allows for an incredibly realistic putting experience, where the ball rolls smoothly, mimicking the conditions found on professional courses. If you’re ready to elevate your backyard game, StarPro Greens offers the perfect solution!
Product Overview
Features of StarPro Greens Turf
The StarPro Greens Turf boasts a variety of features designed for your ultimate enjoyment. First and foremost, its durability ensures it withstands the elements year-round, requiring minimal maintenance. The turf’s high-quality construction promotes excellent ball roll and provides a realistic feel, making it difficult to distinguish between artificial grass and the real deal. Additionally, it’s designed to drain efficiently, preventing waterlogging and keeping the surface ready for putting.
Benefits of Realistic Putting Experience
As you step onto your new putting green, you’ll experience numerous benefits. The most significant advantage is the consistent playing surface, allowing you to hone your skills without the unpredictable nature of traditional grass. You’ll enjoy the convenience of practicing in your backyard at your leisure, improving your game without the need to frequent a golf course. Plus, having a putting green at home creates a wonderful gathering place for family and friends, fostering camaraderie over friendly competitions.
Comparison with Traditional Grass
When compared to traditional grass, artificial turf represents a leap forward in convenience and durability. Unlike natural grass, which requires mowing, watering, and ongoing maintenance, StarPro Greens turf provides a hassle-free solution. You won’t have to worry about brown patches, pests, or the expense of regular upkeep. Instead, you can focus on what truly matters: enjoying your time outdoors and perfecting your putting skills.
Assembly Details
Dimensions of the Putting Green
For your installation, you’ll be working with a pre-cut putting green measuring 5 feet by 12 feet, surrounded by an optional one-foot border. This brings your total area to 7 feet by 14 feet, perfectly sized to fit into most backyards while providing ample space to practice.
List of Necessary Tools
Before you jump into the installation, ensure you have the following tools handy:
- Sharp box cutter or razor knife
- Shovel
- Rake
- Garden tamper (recommended: plate compactor for larger greens)
- Hammer
- Tape measure
- Spikes (6-inch)
Renting a plate compactor is particularly important as it helps create a stable foundation for your green.
Importance of Plate Compactor Rental
Renting a plate compactor is a crucial step that shouldn’t be skipped. The compacted gravel base provides a solid foundation for your putting green, preventing future sinking or shifting. This equipment works wonders in ensuring that your green remains level and retains the contours needed for an authentic putting experience. You can easily find rental options at local hardware or equipment rental stores.
Installation Steps
Unboxing and Lay Out
Once you have all your tools ready, start the installation by unboxing your putting green. Lay it out upside down to see where the holes for the cups are located. This step will also give you the chance to familiarize yourself with the layout, so you know where everything will go.
Preparing the Installation Site
Prepare the site by clearing any debris and ensuring it’s level. If you’re installing over grass, use a string trimmer to cut the grass down to the dirt level. For the ideal installation, the base should not collect water or be overly sloped. Leveling the area is key for functional drainage to keep the surface playable.
Digging and Marking Holes
Next, it’s time to dig and mark the holes for your putting cups. Use the spikes to mark the locations where the cups will be installed. Dig out enough soil for the cups so they fit snugly above the surface – aim for them to be 1/8 inch above the turf for the best experience.
Compacting the Gravel Base
After marking and digging your holes, it’s time to create a gravel base. Layer at least two inches of 3/8 minus gravel across the entire area. This finer mixture helps with drainage and stability. Compact the gravel thoroughly using your compacting equipment, ensuring a smooth and even surface that will hold up under foot traffic.
Cup Installation
Using Cardboard Templates
To ensure precise cup installation, create a cardboard template. This template will guide your digging, ensuring the top of the cup sits at the correct height. Use a trowel to carefully remove gravel, making sure you have enough room for your cups.
Adjusting Cup Heights
Once the cups are in place, gently press down on them to secure them in their designated spots. Double-check to ensure they sit about 3/8 inch below the surface of your putting green, allowing for an authentic rolling experience as you practice your putts.
Rolling Out the Green
With the cups securely in place, it’s time to roll out the putting green over the prepared area. Pay attention to the contours and alignment with the cup locations. If any adjustments are needed, such as adding or removing gravel, now is the time to do that for the optimal ball roll.
Adding Borders
Cutting and Securing Borders
If you opted for borders, it’s now time to cut and secure them. Use the seam tape and adhesive to attach the borders to the green, ensuring a seamless finish that enhances the overall look of your installation.
Leveling the Installation
Make sure everything is level as you secure the borders. This step ensures aesthetic appeal and maintains functionality, allowing for consistent play without unexpected bumps.
Final Attachment Techniques
Once your borders are attached and confirmed level, walk along the seams to ensure they’re firmly pressed together. This final attachment is crucial for the longevity of your putting green.
Result & Enjoyment
Enhancing Outdoor Space
Congratulations! You’ve successfully installed your own backyard putting green. This installation not only adds a beautiful aesthetic to your yard but also creates a dedicated space for relaxation and entertainment.
Increase Property Value
A backyard putting green can significantly increase your property value. As more homebuyers look for unique outdoor features, your green stands out as an attractive offer, enhancing your home’s appeal.
Family and Friends Enjoyment
Your putting green promises to be a center of fun for family and friends. Hosting friendly competitions and casual practice sessions will create lasting memories, all while knocking strokes off your game. Everyone—from kids to adults—will enjoy honing their skills on your new surface.
Gravel Guidance
Choosing the Right Gravel Type
Choosing the right gravel is essential for a successful installation. 3/8 minus gravel with fines is highly recommended for creating a stable, compacted base while allowing for proper drainage. This type of gravel holds its form better than others, ensuring longevity in your setup.
Recommended Mixtures for Base Layers
For optimal performance, mix 50% 3/8 inch gravel with 50% fines. This combination provides the right balance of stability and drainage, making your putting green both playable and durable.
Types of Gravel to Avoid
It’s best to avoid certain types of gravel that can hinder your project:
- Pea gravel: Too rounded, it doesn’t compact well and can easily shift.
- Sand: It’s not suitable for base layers and can wash away over time. Sand can only be used minimally as a final finish layer (maximum quarter-inch).
Materials Needed for Installation
Essential Gravel Specifications
As already mentioned, 3/8 inch gravel is crucial for your installation. This gravel type compacts nicely, and its size allows for appropriate drainage, preventing any potential pooling of water on your green.
Using Fines for Stability
Incorporating fines—smaller particles that fill the gaps between gravel stones—ensures greater stability. This fine material binds together larger gravel pieces, resulting in a solid and dependable foundation for your turf.
Overview of Not Recommended Materials
When deciding on materials, avoid using:
- Pea gravel as it won’t create a stable base.
- Sand, which can wash away and lead to uneven surfaces. By sticking to recommended materials, you set yourself up for long-term success.
Conclusion
Summary of Installation Process
To wrap it up, the installation of your backyard putting green involves carefully preparing your space, marking and digging holes for your cups, creating a gravel foundation, and securely laying down your turf. Each step contributes to a professional-looking finish.
Benefits of DIY Installation
Taking on this DIY project not only saves you money but also gives you a fantastic sense of accomplishment. You’ll gain valuable skills that you can apply in future home improvement tasks while enjoying the rewarding experience of watching your ideas come to life.
Encouragement to Enjoy the Putting Green
Now that your putting green is ready, it’s time to enjoy it to the fullest! Gather your friends, practice your swings, and revel in the knowledge that you’ve created a wonderful space for relaxation and entertainment. Your backyard putting green is not just an investment in your property, but also an investment in joy and shared moments with those you cherish.
Feel free to reach out if you have further inquiries about installation or product specifics. Enjoy your new backyard paradise!

